
This is an old revision of the document!
Table of Contents
Registration Form
Various workflows require the mutual alignment of 3D objects, e.g. on surface features. This also includes the registration of surfaces extracted from volume data.
For this purpose, a registration form can be used at different places, which provides different tools for feature extraction and surface alignment.\
Currently, the object preparation window can be used for the modules
- [Articulate 3D]
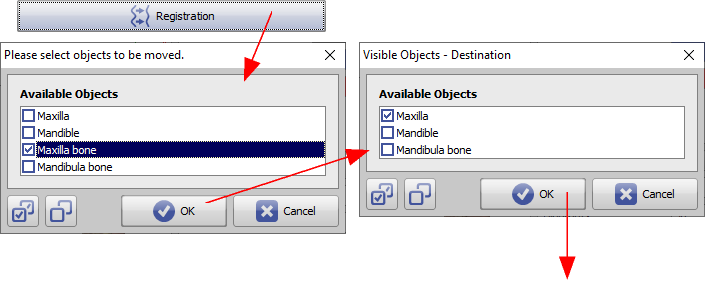
When the form is opened, the two objects or object groups to be registered must be selected in an object list window.
User Interface
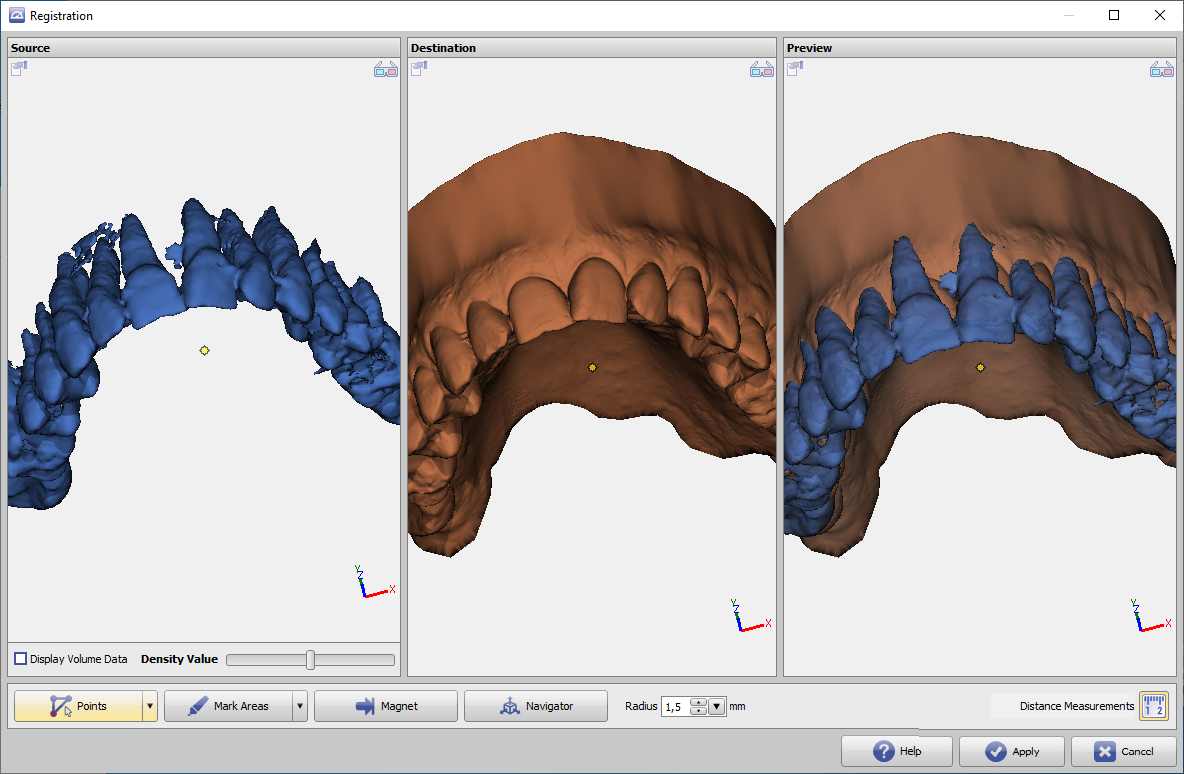
The basic idea is to register the objects of the left view to the object of the middle view. The right view shows the preview of the currently achieved registration.
If the left window contains volume data, the surface to be used for registration can be re-extracted via a density value to be set.\

Via context menu the width of the 3 panels can be equalized and the 3D view can be synchronized (linked).
Registration tools
Various registration tools are provided. Press [Apply] to return the realigned subobject (left) to the parent window.
Point Pair Based Registration

- Set point pairs on source and target object, which should be on top of each other after registration if possible.
- Set the points in the correct order by right-clicking on the objects. Points with the same color are placed on top of each other in the result if possible
- Optionally the surrounding surface of the points can be observed in an adjustable radius
Topologiebasierte Registrierung

- Mit einem Pinselwerkzeug können Oberflächenbereiche auf Objekten markiert werden
- Sind Bereiche grün markiert, werden nur diese Bereiche für die Registrierung verwendet.
- Mit der linken Maustaste können Bereiche markiert werden. Bei gehaltener [STRG] Taste werden die Bereiche wieder von der Markierung abgezogen.
- Optional kann der Radius des Werkzeuges eingestellt werden
- Sind keine Bereiche grün markiert, werden alle Oberflächen verwendet
Magnetwerkzeug

- Quell- und Zielobjekt an einer bestimmten Stelle aufeinanderziehen
- In der Vorschauansicht (rechts) mit Rechtsklick einen Punkt auf dem Quellobjekt auswählen, der sich zum nächstgelegenen Punkt auf der Oberfläche des Zielobjektes bewegen soll
Navigator

- Das Quellobjekt im Vorschaufenster per 3D Navigator manuell bewegen.