This is an old revision of the document!
Moving Onyx-Database Server 3.2
In case you need to replace the server hardware which hosts the OnyxCeph³™ database, or for any other reason that might require moving the database, please follow up the procedure describe below:
1. Request download link for the latest release OnyxCeph³™ 3.2 here.
2. Update he current release on the old server if not done already.
3. Stop database server program OnyxDBServer.exe on the old Server using program Onyx3Config from desktop or program group Onyx3Server.
4. Perform a new installation using the setup CD or download file on the new server. Install the database server and optionally also a client.
5. Stop database server program OnyxDBServer.exe on the new Server using program Onyx3Config from desktop or program group Onyx3Server.
6. Copy folders below from the old Server to the corresponding place on the new server. Either rename the identical subfolders on the new server before or replace these folders by overwriting:
..\Onyx3Server\OnyxDB
..\Onyx3Server\Pictures
Note: Installation path ..\ is displayed in Onyx3Config panel [Status Information].
7. Re-start database server program OnyxDBServer.exe on the new Server using program Onyx3Config from desktop or program group Onyx3Server as a program (right button).
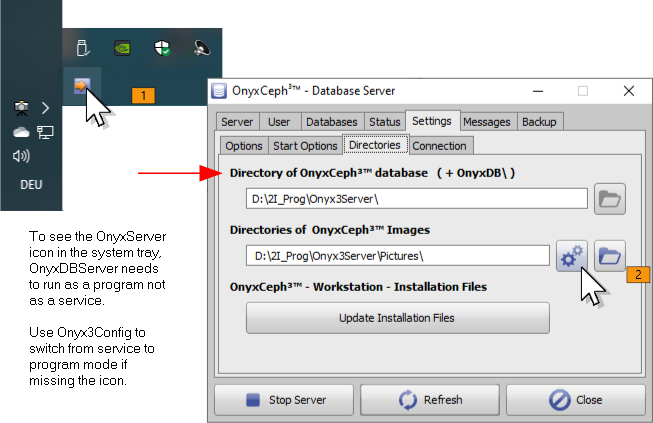
Note: The program window OnyxDBSevrer minimizes to the system tray in the taskbar after startup and must be maximized again from there to continue with step 8.
8. Re-index the image database in the main window of the database server program OnyxDBServer.exe on tab |Settings| subtab |Directories| by button [Re-index Image Database]. Upon completion, stop and re-start the Onyx database thereafter using program Onyx3Config as a service (left button).

9. To re-register OnyxCeph³™, open OnyxCeph 3|OnyxRegister (not OnyxCeph!) directly on any client from local program group folder OnyxCeph 3.
In step 2, generate a new InstallCode and request a new authorization free of charge by button [Email].
10. Re-launch OnyxCeph³™ on each network client with admin permissions and re-connect to the new server via TCP/IP and set this connection as standard (requires to launch OnyxCeph as administrator).
