
en:add_image_2d
Table of Contents
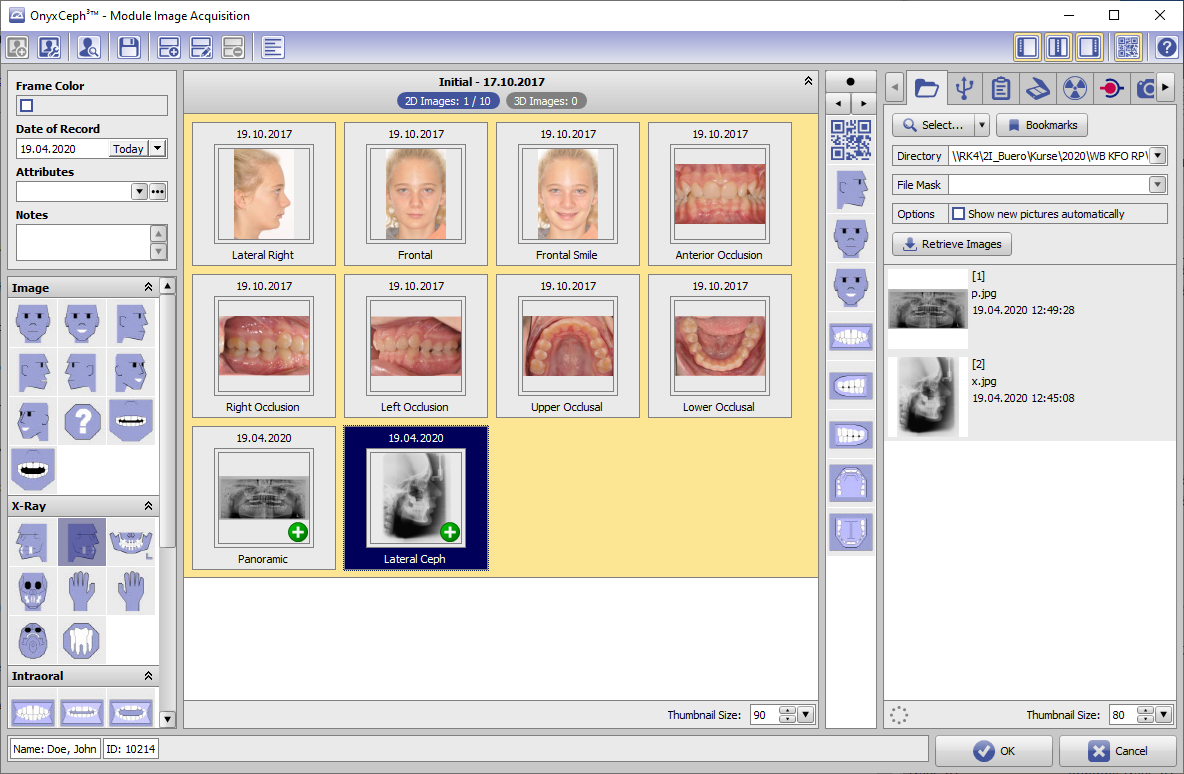
Module Add Image 2D

| Program version | BASIC | 2D PRO | 3D PRO | LAB | OMS |
|---|---|---|---|---|---|
Availablility  |  |  | | | |
not included
included by default
 optionally included
In module Add Image 2D, 2D data (photos, xrays) can be imported from various sources. Record dates, sessions and image types can be assigned, image attributes and comments can be added and finally, the image can be saved in the Onyx database. Images can be imported individually or in blocks (batch import) and the appropriate patient can also be selected automatically using the QR code option.
First Steps
- Activate "Clipping (Line)" in tab "Clip Object"
- Place Landmarks at the model border, last point close to the first one
- Press button "Trim" and confirm the correct trimming
- Select and add socket in tab "Model Base"
- Save as new finding
Module user interface
Links
en/add_image_2d.txt · Last modified: 2023/03/06 12:45 by onyxadmin